Showing posts with label Humor. Show all posts

Sunday, September 24, 2023

Survival Gardening for Solo Preppers: Growing Your Own Food Supply

Ah, the joys of gardening. The scent of freshly turned soil, the satisfaction of watching plants grow, and the occasional battle with unruly weeds. But what if I told you that gardening isn't just about cultivating a green thumb and boasting about your prize-winning zucchinis? It's also a critical skill for solo preppers – those intrepid individuals who are ready to tackle the end of the world on their own terms. In this blog, we're diving headfirst into the world of survival gardening, sprinkled with a dash of humor, and we'll show you how to grow your own food supply like a boss.

Chapter 1: Why You Need to Dig In

Alright, solo prepper, let's address the elephant in the room: why should you bother with gardening when you can just stockpile canned goods? Well, canned goods have an expiration date, and when doomsday hits, you don't want your trusty can opener to be your best friend. Here's why gardening is your secret weapon:

1. Sustainability: Your food supplies won't last forever, but with a garden, you can keep producing food year after year.

2. Nutrition: Freshly harvested veggies pack more nutrients than their canned counterparts. Plus, it's hard to grow a can of processed cheese.

3. Exercise: Gardening keeps you active, ensuring you'll still be fit when you have to outrun zombies.

Chapter 2: Location, Location, Location

Now that you're sold on the idea of gardening, let's talk about where to set up shop. You can't just plop your garden anywhere and expect it to thrive. Here's what you need to consider:

1. Sunlight: Plants are like solar panels – they need sunlight to thrive. Find a spot that gets at least 6-8 hours of sunlight per day.

2. Soil Quality: Not all dirt is created equal. Invest in a soil test kit to figure out what you're working with and how to improve it.

3. Water Source: A garden without water is a sad sight. Ensure you have a nearby water source or a reliable rainwater harvesting system.

Chapter 3: Choosing Your Green Allies

Your garden is like a superfood army, and you're the general. What you plant matters, so let's talk about your green allies:

1. Easy Mode Veggies: If you're new to gardening, start with easy-to-grow veggies like tomatoes, peppers, and zucchini. They practically grow themselves.

2. Storage Crops: Potatoes, carrots, and onions are your go-to storage crops. They'll keep well without refrigeration.

3. Companion Planting: Embrace your inner gardener-chemist by using companion planting to keep pests at bay. Plant marigolds to repel aphids or garlic to deter vampires… I mean, root-destroying nematodes.

Chapter 4: Maintenance Mode

Now that your garden is in full swing, it's time to talk about maintenance. Gardening isn't a one-and-done deal – it's more like a long-term relationship with dirt. Here's what you need to do:

1. Weeding: Those pesky weeds are your garden's frenemies. Keep them in check, or they'll steal your plant's nutrients and space.

2. Watering: Don't drown your plants, but don't let them go thirsty either. Consistency is key. Water in the morning to prevent diseases, and don't forget to talk to your plants while you're at it.

3. Pests and Diseases: Be on the lookout for invaders. Handpick pests if you're feeling brave, or invest in some organic pesticides. Your garden is a battleground – protect it!

Chapter 5: The Harvest Celebration

Finally, the moment you've been waiting for – the harvest. Picture yourself standing amidst a bounty of homegrown veggies, feeling like the king or queen of your apocalyptic castle. But before you start dancing, remember a few things:

1. Timing: Pick your produce at the right time. Google is your friend here – it's like having a gardening guru on standby.

2. Preservation: Canning, freezing, and dehydrating are your best friends when it comes to preserving your hard-earned harvest. Stock up on Mason jars and learn the art of food preservation.

3. Sharing is Caring: If you have more than you can handle, share the bounty with fellow survivors. You might make a few friends and allies in the process.

Conclusion: Green Thumbs and Strong Survival

Survival gardening isn't just about growing food; it's about self-reliance, sustainability, and a dash of horticultural humor. By tending to your garden, you're not only ensuring your own survival but also reconnecting with a primal, satisfying connection to the earth. So, grab your gardening gloves and a shovel, and start growing your own food supply – because when the apocalypse comes knocking, your garden will be your secret weapon, and your veggies will be the envy of the wasteland.

Wednesday, September 20, 2023

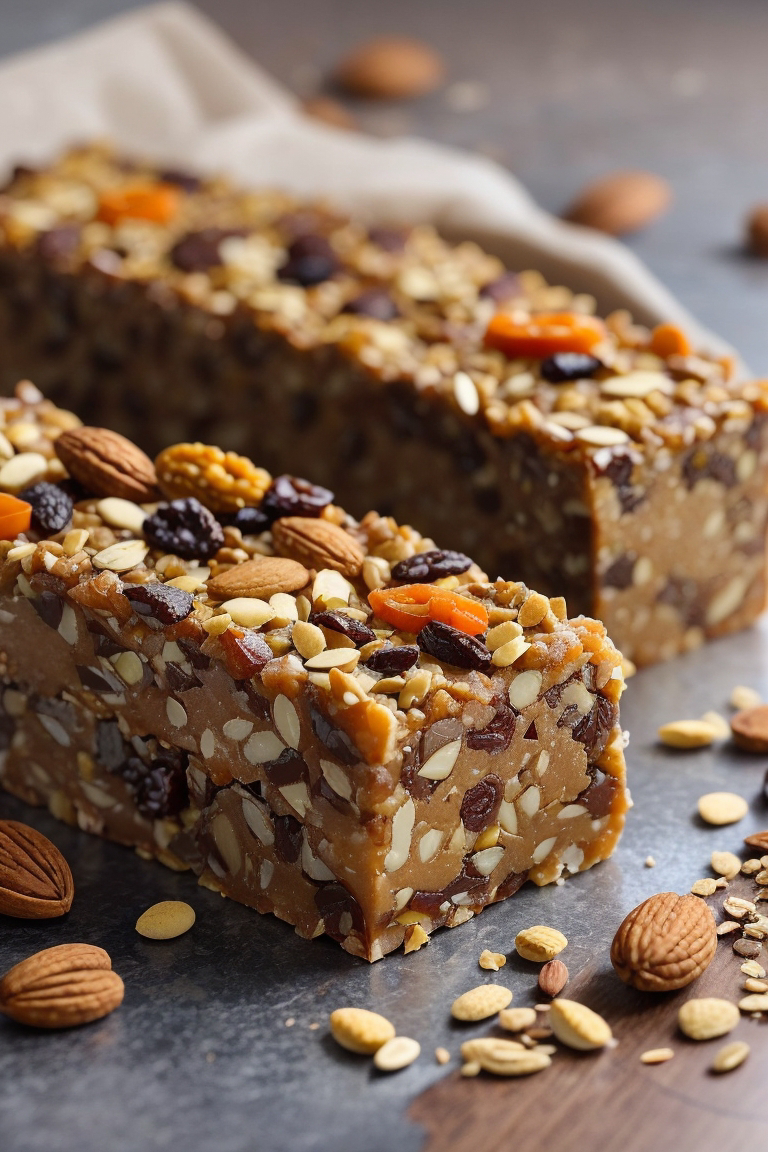
Survival Eats: DIY Energy Bars for Urban Explorers and Wilderness Adventurers

Survival Eats: DIY Energy Bars for Urban Explorers and Wilderness Adventurers


In a world where instant gratification often trumps long-term planning, there's a tribe of folks who've embraced the art of preparation. Whether you're an urban explorer, a wilderness adventurer, or just someone who likes to be ready for anything, this blog post is for you. Today, we're diving into the world of DIY energy bars – the perfect fuel to keep you going in any situation. And don't worry, we'll add a dash of humor to keep things lively.

The Quest for the Perfect Survival Snack

Picture this: you're deep in the urban jungle, venturing into an abandoned building with only your flashlight to guide you. Or perhaps you're hiking through the wilderness, miles away from the nearest convenience store. Suddenly, hunger strikes, and you realize you forgot to pack snacks. The horror! Fear not, fellow adventurers, for we have the answer: homemade energy bars.

The Ingredients That Keep You Kicking

Our adventure begins with the ingredients. Remember, these bars aren't just delicious; they're also packed with the nutrients you need to survive your latest escapade.

1. Rolled Oats (1 cup): The backbone of your energy bar, rolled oats provide slow-burning carbs to keep you energized for hours. They're like the tortoise in the race against hunger.

2. Peanut Butter (1/2 cup): This sticky superhero adds protein and healthy fats to the mix. It's the Batman to your energy bar's Gotham City.

3. Honey/Maple Syrup (1/3 cup): Your natural sweeteners bring a dash of sugary joy. Plus, they act as binding agents, holding your bar together like a team of trusty sidekicks.

4. Dried Fruits (1/4 cup): Think of these as your adventure's flavor bursts. Raisins, cranberries, or apricots are like little explosions of taste in every bite.

5. Nuts and Seeds (1/4 cup): Almonds, walnuts, chia seeds – choose your own adventure! These add a satisfying crunch and a dose of healthy fats.

6. Protein Powder (Optional, 1/4 cup): When your muscles cry out for aid, protein powder swoops in to save the day. It's like the Avenger of the ingredient world.

7. Vanilla Extract (1 tsp): A drop of this adds a touch of sophistication to your bars. Think of it as the James Bond of your recipe – debonair and smooth.

8. A Pinch of Salt: Just like a pinch of drama in a movie, salt enhances the flavor profile. It's the suspenseful plot twist you didn't know you needed.

The Heroic Preparation Process

Now that you've assembled your team of ingredients, it's time to bring them together for a culinary adventure.

1. Combine your rolled oats, dried fruits, chopped nuts, seeds, and protein powder (if you're going for superhero-level strength) in a mixing bowl. They're like the Avengers assembling to save the day.

2. In a saucepan, heat your peanut butter, honey/maple syrup, vanilla extract, and a pinch of salt. Stir until they form a smooth and harmonious alliance. This mixture will hold your bars together like the Justice League.

3. Pour your peanut butter mixture over your dry ingredients. This is the epic battle where the heroes unite against a common enemy: hunger.

4. Stir everything together until your dry ingredients are fully coated. If the mixture looks too dry, add more honey or peanut butter. You're like a master chef, balancing flavors in your superhero dish.

5. Line an 8x8-inch baking dish with parchment paper. Transfer your mixture into the dish and use a spatula (or your superhuman strength) to press it firmly and evenly. You're building the foundation of your culinary skyscraper.

6. Refrigerate for at least 2 hours, or until your creation is firm. This is your hero's training montage, where they prepare for the final showdown with your hunger.

7. Once set, remove it from the dish and cut it into bars or squares. You're the director of your culinary action movie, making the final, satisfying cut.

8. Individually wrap each bar in plastic wrap or store them in an airtight container. Your bars are now ready for action, whether it's in the urban jungle or the wilderness.

The Long Shelf Life: Your Secret Weapon

Why are these DIY energy bars perfect for preppers? Simple – they have a long shelf life. These bars can hang out in your pantry, patiently waiting for the day you need them most. Forget the "best by" date; these bars are the guardians of deliciousness and nutrition.

Urban Prepping: The Concrete Jungle Survival

Imagine you're an urban explorer, venturing into forgotten places where civilization has left its mark. Your energy bars are like tiny urban survival kits, giving you the energy to conquer stairwells, evade security cameras, and uncover hidden secrets.

Wilderness Prepping: Nature's Playground

Now, shift gears to the wilderness adventurer. You're miles away from civilization, surrounded by towering trees and curious wildlife. Your homemade energy bars are your trusty sidekicks, keeping you fueled as you hike, camp, and explore the great outdoors.

Conclusion: Be Prepared, Be Energized

In the world of urban exploration and wilderness adventures, preparation is the name of the game. Whether you're a seasoned pro or just getting started, having a stash of homemade energy bars in your backpack can make all the difference. These nutrient-packed, shelf-stable wonders will keep you energized and ready for whatever challenges lie ahead.

So, channel your inner chef, assemble your ingredients, and create your own batch of survival snacks. With a little humor and a lot of preparation, you'll be ready to conquer the urban and wilderness frontiers like a true adventurer. Remember, in the world of prepping, the best defense is a good snack offense!

Nutritional Facts:
Per Serving (1 bar):
- Calories: 250-280 kcal
- Total Fat: 12-15g
- Saturated Fat: 2-3g
- Sodium: 50-75mg
- Total Carbohydrates: 30-35g
- Dietary Fiber: 4-5g
- Sugars: 15-18g
- Protein: 7-9g

Navigating Legal and Ethical Issues as a Lone Prepper

Ah, the life of a lone prepper! You've mastered the art of storing enough canned goods to outlast a zombie apocalypse, and your bug-out ...